RV Solar Power System Installation: Complete DIY Guide for Beginners
Installing solar panels on your RV transforms your camping experience by providing reliable off-grid power for extended boondocking adventures. While the initial investment may seem substantial, solar systems pay for themselves through reduced generator fuel costs and increased camping flexibility. This comprehensive guide walks you through system sizing, component selection, and installation steps that enable even beginners to successfully harness solar energy for their RV.
Calculating Your Power Needs
Proper system sizing begins with understanding your daily power consumption. List all electrical devices you'll use while camping and their wattage, then multiply by hours of daily use to calculate watt-hours. Add 20% for system inefficiency and battery charging losses. Most RVers find that 400-800 watts of solar panels with 200-400 amp-hours of battery capacity meets typical needs, though larger systems benefit full-timers with higher consumption.
- LED lights and phone charging require minimal power, typically under 50 watt-hours daily
- Laptop use and water pump operation add another 100-200 watt-hours per day
- Residential refrigerators demand 1000-2000 watt-hours, requiring larger solar arrays
- Air conditioning remains impractical for most solar systems due to extreme power demands
- Inverter efficiency losses typically consume 10-15% of generated power during conversion
Solar System Component Comparison
Understanding the key components and their options helps you build an efficient system within your budget.
| Component | Budget Option | Premium Option |
|---|---|---|
| Solar Panels | Polycrystalline 100W ($100) | Monocrystalline 200W ($300) |
| Charge Controller | PWM 30A ($50) | MPPT 40A ($200) |
| Batteries | AGM 100Ah ($200) | Lithium 100Ah ($800) |
| Inverter | Modified Sine 1000W ($100) | Pure Sine 2000W ($400) |
"The biggest mistake new solar installers make is undersizing their system—always plan for growth and unexpected power needs rather than bare minimum requirements."
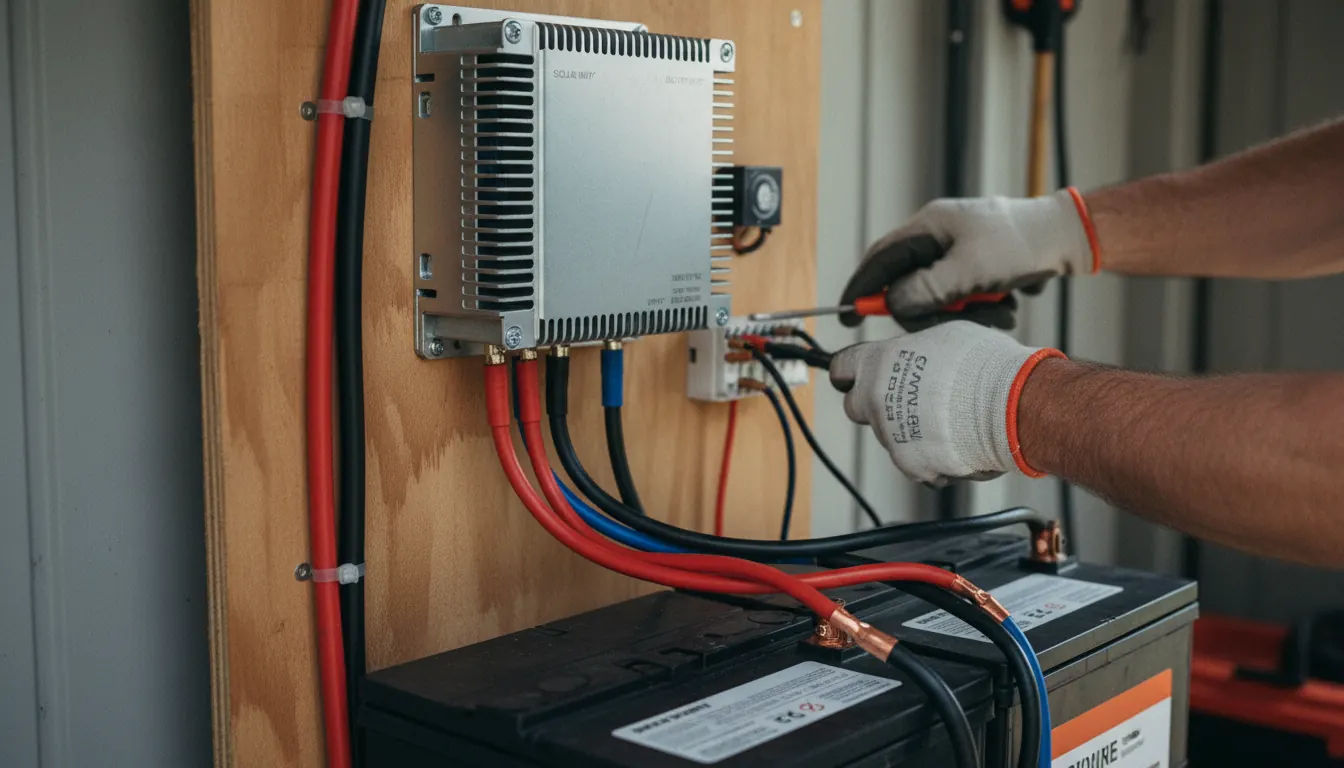
Step-by-Step Installation Process
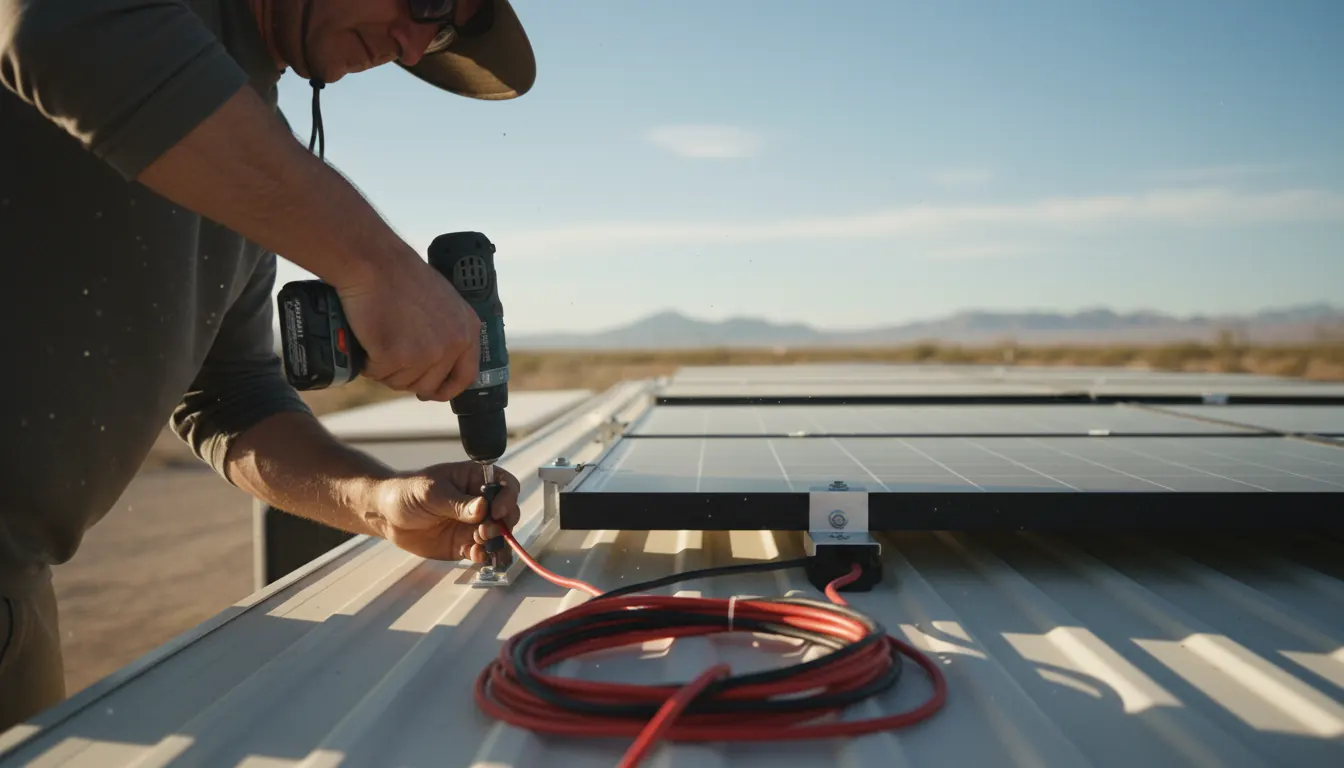
Begin by planning panel placement on your roof, avoiding areas with shade from AC units or vents. Mount panels using proper sealant to prevent leaks, then run wiring through existing access points into your RV interior. Install the charge controller near batteries, following manufacturer specifications for wire gauge based on amperage and distance. Connect batteries in parallel for 12-volt systems or series for 24-volt configurations, ensuring all connections are tight and properly fused for safety.